In this session we will cover two labs:
Youtube Link: Navigation for labs
Lab1: pipeline for java project
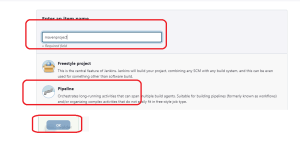
Create a pipeline job: New item–> name the project “mavenproject”–>pipeline –>ok
Install maven build agent on Jenkins master server [use putty]
apt install maven -y
In the pipeline script block, copy and paste below code
pipeline {
agent any
stages {
  stage('SCM code') {
   steps {
    git 'https://github.com/hellokaton/java11-examples.git'
   }
  }
 stage('Build') {
  steps {
   sh 'mvn clean package'
  }
 }
 stage('Publish') {
  steps {
  // Add steps to publish artifacts or deploy the application
  // For example, you can use the 'archiveArtifacts' step to archive built artifacts
  archiveArtifacts 'target/*.jar'
     }
  }
}
}
Break down the stages and steps in the pipeline:
- SCM code Stage: This stage is responsible for checking out the source code from a Git repository.
- It uses the
gitstep to clone the repository from the provided URL.
- It uses the
- Build Stage: In this stage, the code is built using Maven.
- It uses the
shstep to execute the Maven commandmvn clean package, which cleans the project, compiles the code, runs tests, and packages the application into a.jarfile.
- It uses the
- Publish Stage: This stage handles the publishing or archiving of the built artifacts.
- It uses the
archiveArtifactsstep to archive the.warfiles located in thetargetdirectory. Archiving artifacts is important in case you want to keep track of built binaries for future reference or deployment.
- It uses the
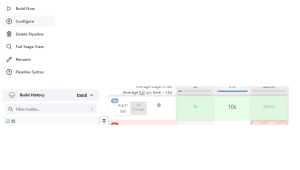
- Click on Build now and check the build history
Lab2:
pipeline {
agent any
parameters {
choice(
name: 'ENVIRONMENT',
choices: ['dev', 'qa', 'prod'],
description: 'Select the deployment environment'
)
}
stages {
stage('SCM code') {
steps {
git 'https://github.com/hellokaton/java11-examples.git'
}
}
stage('Build') {
steps {
sh 'mvn clean package'
}
}
stage('Publish') {
when {
expression { params.ENVIRONMENT == 'prod' }
}
steps {
// Add steps to publish artifacts or deploy the application for 'prod'
// For example, you can use the 'archiveArtifacts' step to archive built artifacts
archiveArtifacts 'target/*.jar'
}
}
}
}
Lab 3 : Priority
pipeline {
agent any
parameters {
choice(
name: 'ENVIRONMENT',
choices: ['dev', 'qa', 'prod'],
description: 'Select the deployment environment'
)
choice(
name: 'PRIORITY',
choices: ['high', 'low', 'middle'],
description: 'Select the priority'
)
}
stages {
stage('SCM code') {
steps {
git 'https://github.com/hellokaton/java11-examples.git'
}
}
stage('Build') {
steps {
sh 'mvn clean package'
}
}
stage('Publish High Priority') {
when {
expression { params.ENVIRONMENT == 'prod' && params.PRIORITY == 'high' }
}
steps {
// Add steps to publish high-priority artifacts or deploy the application for 'prod'
// For example, you can use the 'archiveArtifacts' step to archive built artifacts
archiveArtifacts 'target/*.jar'
}
}
stage('Publish Low Priority') {
when {
expression { params.ENVIRONMENT == 'prod' && params.PRIORITY == 'low' }
}
steps {
// Add steps to publish low-priority artifacts or deploy the application for 'prod'
// For example, you can use the 'archiveArtifacts' step to archive built artifacts
archiveArtifacts 'target/*.jar'
}
}
stage('Publish Middle Priority') {
when {
expression { params.ENVIRONMENT == 'prod' && params.PRIORITY == 'middle' }
}
steps {
// Add steps to publish middle-priority artifacts or deploy the application for 'prod'
// For example, you can use the 'archiveArtifacts' step to archive built artifacts
archiveArtifacts 'target/*.jar'
}
}
}
}
Lab4 : Same Jenkins project we will build using maven plugin
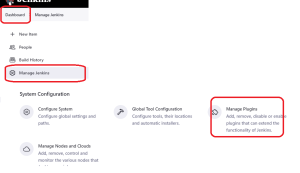
- Go to Dashboard->Manage Jenkins->Manage Plugins
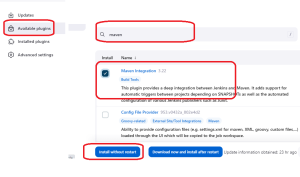
2. Available plugin–>search for maven–>check mark maven integration plugin–>Install without restart
3. Set the java home and maven home
mvn home:  /usr/share/maven

java home:  /usr/lib/jvm/java-17-openjdk-amd64
3. Setup javahome and mvn home on jenkins dashboard
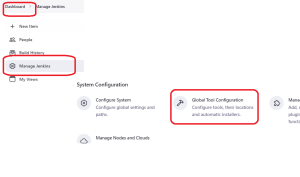
Go to Dashboard->Manage Jenkins–> System configuration–>Global tools configuration
4. JDK–>Add Jdk–>name as Java home–>path “/usr/lib/jvm/java-17-openjdk-amd64”
5. Same page only Under global tool configuration–> Setup maven home
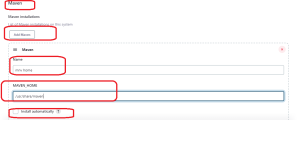
maven–>add maven–>uncheck install automatically–>maven name “mvnho”–>maven_home –>/usr/share/maven and save it
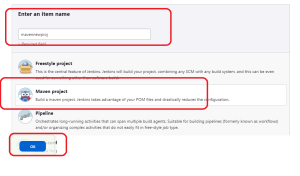
6. Create a New Item–>name “mvnnewproj”–>maven project–>ok
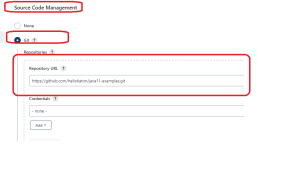
7. under source code management add git repo and save
https://github.com/hellokaton/java11-examples.git
8. Build now–>check build history–>check console output
Observe difference between lab1 and lab2
